I recently finished a needlepoint tapestry kit, and today I decided to stretch it into shape... It's normal that stitched canvas get a bit out of shape and need to be stretched (or "blocked") to become as they should.
It's an easy operation, luckily!
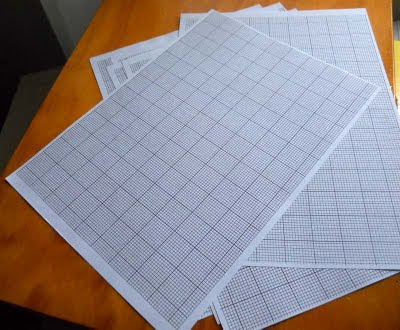
I started with some paper sheets printed in squares (there are lots of sites where you can download similar templates, any squared paper will do );
of course I needed a big sheet, so I just jointed many sheets together, put them on a large wooden board and covered them with a transparent plastic sheet:

The canvas luckily was not _terribly_ out of shape, because soon after starting it I put it on a frame.. So it wasn't too difficult to fix it. This is the stitched canvas (it's a DMC pattern called "Pansy Jazz tapestry")...

I turned it with the back side up and started to fix it to the board with thumbtacks, paying attention to keep the stitched border straight along one of the lines (I started from the middle of the top edge)

I continued this way all along the four edges; obviously in some places it was easy, in others I had to pull... In the end the tapestry was square, but full of bumps (which don't show in the photo, but were there and prevented it to come on focus)

This is practically all! The next step is very easy, and that's to spray with water the back of the stitched tapestry (not so much as to soak it, but enough to leave it wet)... I did it and left the canvas to dry, still fixed to the board.
It should be left there for a couple of days, before removing the tapestry. I'm looking forward to seeing it, as the bumps seem to have already disappeared after just few hours...I'm very curious to see the finished result!
Recentemente ho finito un ricamo a mezzopunto su canovaccio, e oggi ho deciso di metterlo in forma....E' normale che i canovacci ricamati tendano a deformarsi un po', e hanno bisogno di essere tesi per tornare come dovrebbero.
E' un'operazione facile, per fotuna!
Ho iniziato con della carta quadrettata (ci sono un sacco di siti che permettono di scaricare template per carte millimetrate o quadrettate, qualunque formato va bene)
(Vedi foto1)
Naturalmente mi serviva un foglio grande, cosi' ho giuntato vari fogli insieme, li ho messi su un'asse di legno grande e li ho coperti con un foglio di plastica trasparente.
(Vedi foto2)
Il canovaccio per fortuna non era _terribilmente_ deformato, perche' poco dopo averlo iniziato l'ho messo su un telaio...Cosi' non e' stato molto difficile sistemarlo.
Questo e' il canovaccio ricamato (e' un kit DMC intitolato "Pansy Jazz tapestry")
(Vedi foto3)
L'ho voltato con il retro verso l'alto e ho cominciato a fissarlo con delle puntine da disegno, stando attenta a mantenere il bordo del ricamo dritto seguendo una delle linee (ho iniziato dalla meta' del lato superiore)
(Vedi foto4)
Ho continuato in questo modo lungo tutti e quattro i lati; ovviamente in alcuni punti e' stato facile, in altri ho dovuto tirare abbastanza... Alla fine il ricamo era in squadro, ma pieno di gobbe (che non si vedono in questa foto, ma c'erano e hanno impedito alla macchina di mettere a fuoco)
(Vedi foto5)
In pratica, questo e' tutto! Il passo successivo e' molto semplice, e cioe' bisogna spruzzare con dell'acqua (con uno spray) il retro del canovaccio ricamato (non tanto da inzupparlo, ma abbastanza da bagnarlo)... L'ho fatto e ho lasciato il canovaccio ad asciugare, sempre fissato all'asse di legno.
Dovrebbe restare li' per un paio di giorni prima di toglierlo...Non vedo l'ora di tirarlo via e guardarlo, perche' le gobbe sembrano gia' sparite dopo poche ore...Sono molto curiosa di vedere il risultato finale!
It's an easy operation, luckily!
I started with some paper sheets printed in squares (there are lots of sites where you can download similar templates, any squared paper will do );

of course I needed a big sheet, so I just jointed many sheets together, put them on a large wooden board and covered them with a transparent plastic sheet:

The canvas luckily was not _terribly_ out of shape, because soon after starting it I put it on a frame.. So it wasn't too difficult to fix it. This is the stitched canvas (it's a DMC pattern called "Pansy Jazz tapestry")...

I turned it with the back side up and started to fix it to the board with thumbtacks, paying attention to keep the stitched border straight along one of the lines (I started from the middle of the top edge)

I continued this way all along the four edges; obviously in some places it was easy, in others I had to pull... In the end the tapestry was square, but full of bumps (which don't show in the photo, but were there and prevented it to come on focus)

This is practically all! The next step is very easy, and that's to spray with water the back of the stitched tapestry (not so much as to soak it, but enough to leave it wet)... I did it and left the canvas to dry, still fixed to the board.
It should be left there for a couple of days, before removing the tapestry. I'm looking forward to seeing it, as the bumps seem to have already disappeared after just few hours...I'm very curious to see the finished result!
Recentemente ho finito un ricamo a mezzopunto su canovaccio, e oggi ho deciso di metterlo in forma....E' normale che i canovacci ricamati tendano a deformarsi un po', e hanno bisogno di essere tesi per tornare come dovrebbero.
E' un'operazione facile, per fotuna!
Ho iniziato con della carta quadrettata (ci sono un sacco di siti che permettono di scaricare template per carte millimetrate o quadrettate, qualunque formato va bene)
(Vedi foto1)
Naturalmente mi serviva un foglio grande, cosi' ho giuntato vari fogli insieme, li ho messi su un'asse di legno grande e li ho coperti con un foglio di plastica trasparente.
(Vedi foto2)
Il canovaccio per fortuna non era _terribilmente_ deformato, perche' poco dopo averlo iniziato l'ho messo su un telaio...Cosi' non e' stato molto difficile sistemarlo.
Questo e' il canovaccio ricamato (e' un kit DMC intitolato "Pansy Jazz tapestry")
(Vedi foto3)
L'ho voltato con il retro verso l'alto e ho cominciato a fissarlo con delle puntine da disegno, stando attenta a mantenere il bordo del ricamo dritto seguendo una delle linee (ho iniziato dalla meta' del lato superiore)
(Vedi foto4)
Ho continuato in questo modo lungo tutti e quattro i lati; ovviamente in alcuni punti e' stato facile, in altri ho dovuto tirare abbastanza... Alla fine il ricamo era in squadro, ma pieno di gobbe (che non si vedono in questa foto, ma c'erano e hanno impedito alla macchina di mettere a fuoco)
(Vedi foto5)
In pratica, questo e' tutto! Il passo successivo e' molto semplice, e cioe' bisogna spruzzare con dell'acqua (con uno spray) il retro del canovaccio ricamato (non tanto da inzupparlo, ma abbastanza da bagnarlo)... L'ho fatto e ho lasciato il canovaccio ad asciugare, sempre fissato all'asse di legno.
Dovrebbe restare li' per un paio di giorni prima di toglierlo...Non vedo l'ora di tirarlo via e guardarlo, perche' le gobbe sembrano gia' sparite dopo poche ore...Sono molto curiosa di vedere il risultato finale!
Comments